- Google Address Autocomplete
- Flatsome UX Builder
- ActiveCampaign
- Paypal Reference Transactions
- How PaypPal/Stripe Works
- Enabling Enfold Avia Layout Builder
- Setting Up Authorize.net for Upsell & Downsell
- Supported Payment Gateways
- Setting Up A/B Testing with Google Optimize
- Setting Quantity and Discount for Products on the Checkout Page
- Using CartFlows with Beaver Builder
- Hiding Fields on the Checkout Page
- Installing WooCommerce
- Using WooCommerce
- Using Your Theme's Header & Footer in a Step
- Embedding a Checkout Form on the CartFlows Checkout Page
- Hiding WooCommerce Pages and Products
- Using Pricing Tables
- Adding an Affiliate Program
- Setting a Flow as the Homepage
- Dynamic Offers aka Rule Engine
- Instant Layout for Checkout and Thank You Step
- Adding Products from the URL to the Checkout Page
- Setting Up A/B Testing for Steps
- Deleting Plugin Data During Uninstallation
- Importing Ready-Made Templates for Flows and Steps
- Importing and Exporting Funnels and Individual Page Builder Templates
- URL Parameters
- Replacing the Main Checkout Order with an Upsell or Downsell
- Rolling back to a Previous Version
- Flow in Test Mode
- Troubleshooting Plugin and Theme Conflicts
- Resolving the "Please Select a Simple, Virtual, and Free Product" Error
- Resolving the Endless Loading Issue on Checkout
- Fixing the "We can't seem to find an order for you." Error on the Thank You Page
- Fixing the "Checkout ID Not Found" Error
- Fixing the "Session Expired" Error Message
- Resolving "Order Does Not Exist" Error on Upsell/Downsell Page
- Fixing the "Sorry, This Product Cannot Be Purchased" Error
- Resolving "No Product is Selected" Error
- Disabling Auto-fill of Address Fields Based on Zip Code
- Enabling Theme's Scripts & Styles Without Changing Page Template
- Disabling Auto-fill of Checkout Fields
- Allowing Cache Plugins to Cache CartFlows Pages
- Changing the "Choose a Variation" Text
- VAT Field Not Displaying for WooCommerce EU/UK VAT Compliance Plugin
- Enabling the Product Tab on Store Checkout
- Displaying the Order Summary Open on Mobile Devices
What is Store Checkout?
With the release of CartFlows 1.10.0, we introduced a simpler and more intuitive way to manage your global checkout using a new funnel type called Store Checkout.
Previously, identifying which funnel was assigned as the Global Checkout could be confusing—especially if you had numerous funnels. The new Store Checkout concept simplifies this by providing a dedicated interface and better control, replacing the old Global Checkout approach.
Once enabled, the Store Checkout will replace the default WooCommerce checkout page with your CartFlows-designed checkout experience, making it easier to manage and optimize conversions without confusion.
What’s New in Store Checkout?
Here are the key changes introduced with the Store Checkout feature:
- Enable/Disable Store Checkout: You can now toggle whether CartFlows should take over the WooCommerce checkout page.
- Fixed Checkout Step Position: The checkout step in the store flow cannot be reordered. It will always appear right after the Cart page, ensuring the correct flow of WooCommerce transactions.
- Removed Product Tab: Since this checkout is designed to replace the default WooCommerce flow, the Product tab has been removed from the settings. If needed, you can still enable it using a filter as outlined in our documentation.
How to Set Up Store Checkout
There are two ways to set up the Store Checkout in CartFlows:
Option 1: Through the Onboarding Process
- Ideal for new users installing CartFlows for the first time.
Option 2: Manual Setup
Follow these steps to manually configure the Store Checkout:
Step 1: Navigate to the Store Checkout Menu
Go to the CartFlows > Store Checkout section from your WordPress dashboard.

Step 2: Create a Store Checkout
Click the Create Store Checkout button to begin the setup process.

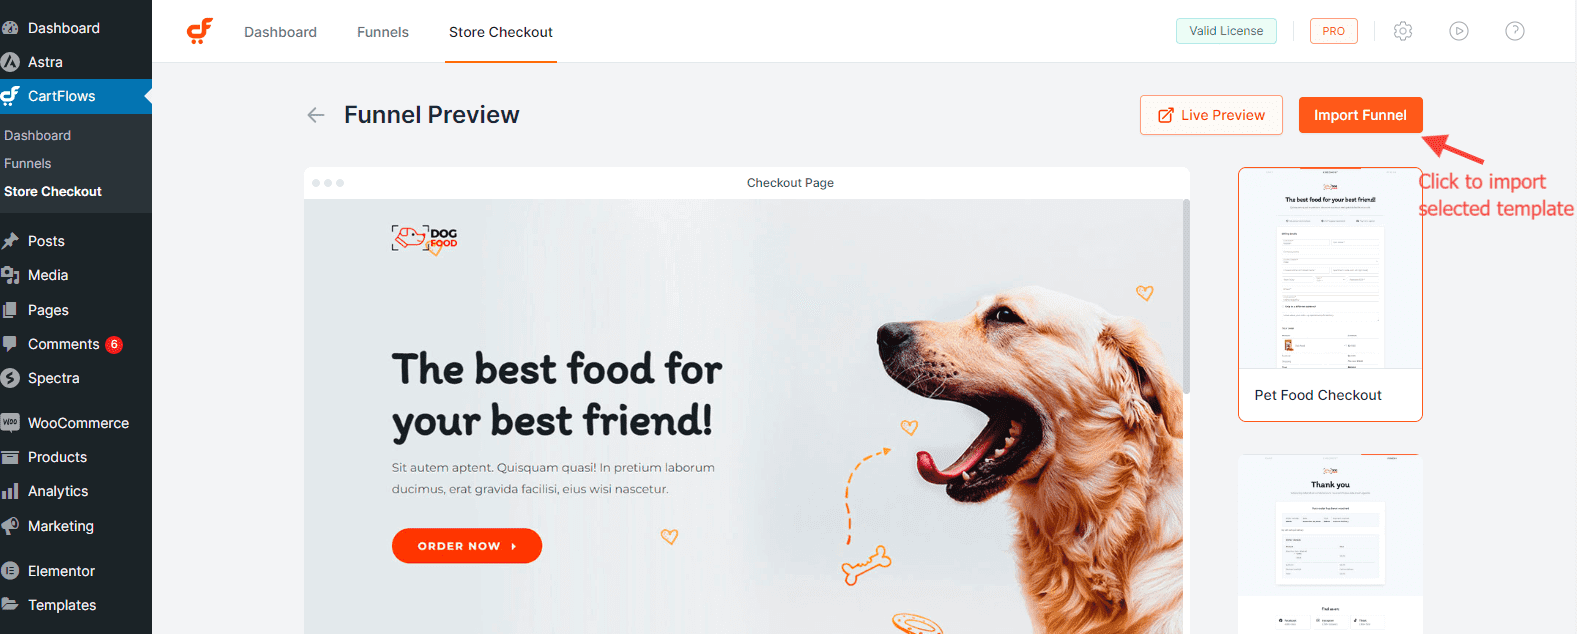
Step 3: Choose a Template
Select from our ready-made templates and click Import Template to bring it into your site.
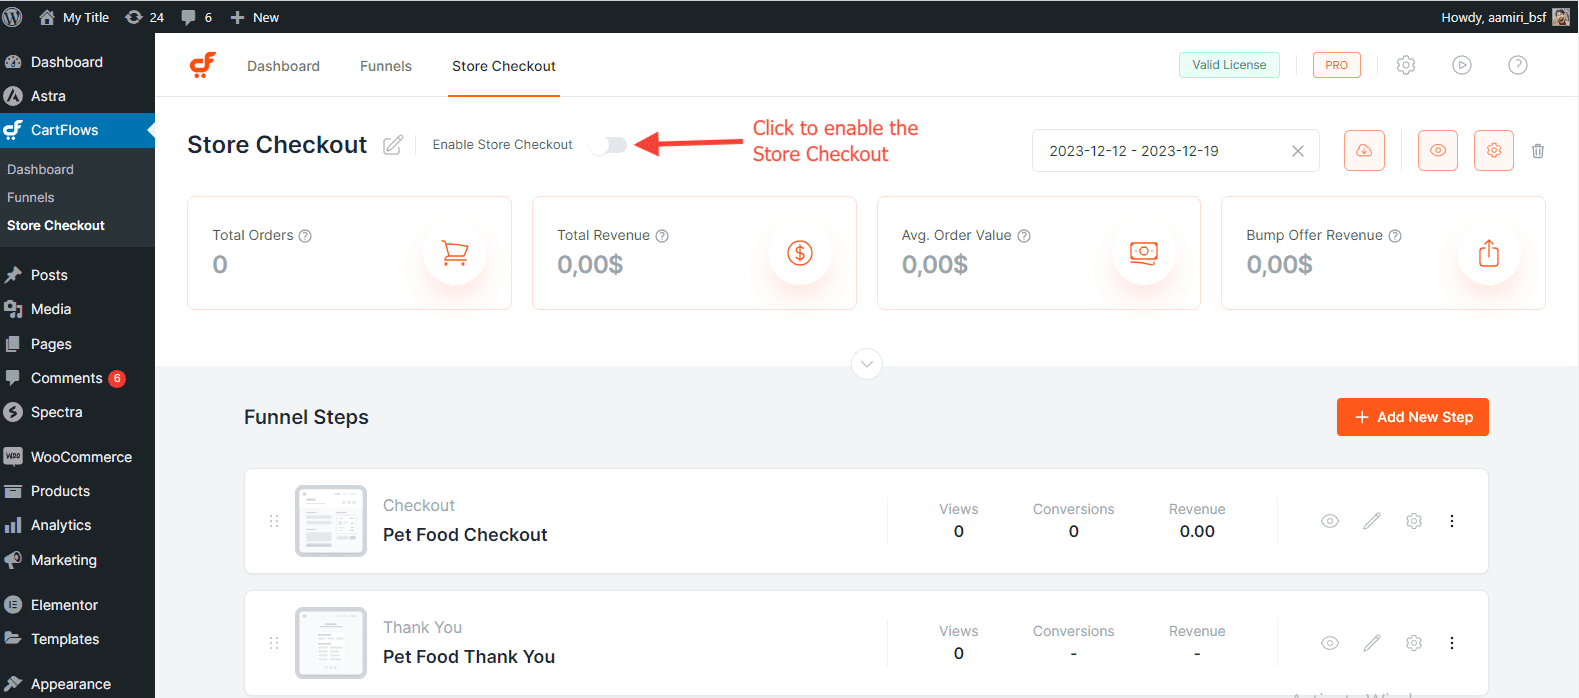
Step 4: Customize and Enable
Edit the imported template as needed. Once ready, click the Enable Store Checkout button to activate it. This replaces the WooCommerce default checkout with your new CartFlows checkout.
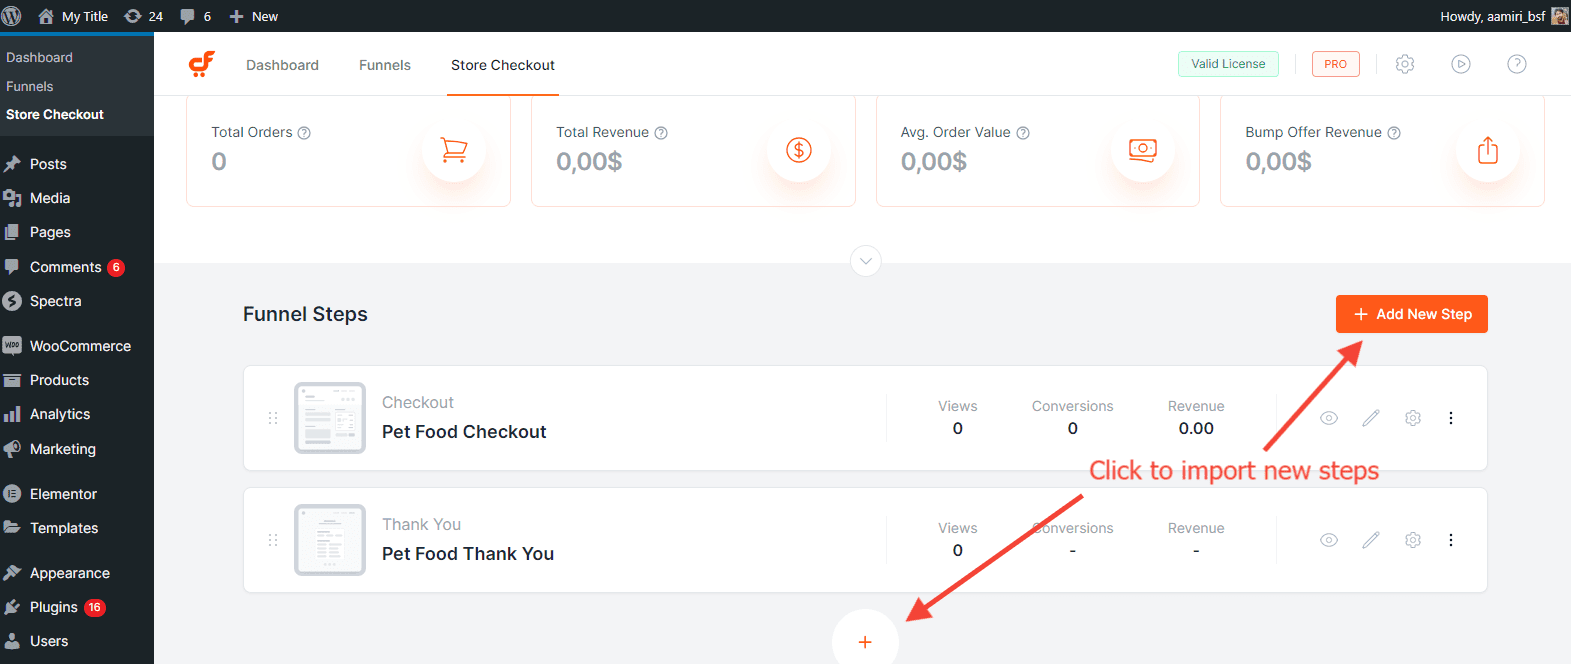
Step 5: Add Additional Steps (Optional)
You may add Upsell or Downsell steps after the Checkout page if desired. Other step types like Optin and Landing pages are not applicable in this Store Checkout.
Frequently Asked Questions
We don't respond to the article feedback, we use it to improve our support content.
